DIY Solar Panel Installation: Step-by-Step Guide for Beginners | Save Energy at Home
Learn how to install solar panels at home with this beginner-friendly DIY solar installation guide. Discover tools, safety tips, and common mistakes to avoid.
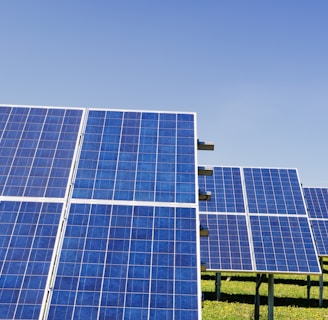
INSTALLATION GUIDE
6/29/20252 min read

Why Choose DIY Solar Installation?
Installing solar panels yourself can save thousands of dollars in labor costs. Plus, it gives you full control over your energy setup. Here are some key benefits:
Cost savings on installation
Energy independence
Increased home value
Reduced carbon footprint
What You’ll Need
Before diving into the installation, gather these essential tools and materials:
Solar panels
Inverter (string or micro-inverter)
Mounting hardware (rails, brackets, bolts)
Charge controller (for off-grid systems)
Battery storage (optional)
Wiring and connectors
Safety gear (gloves, goggles, harness)
Step-by-Step Guide to DIY Solar Panel Installation
Step 1: Assess Your Energy Needs
Review your electricity bills to determine your average monthly usage (in kWh).
Use online calculators to estimate the number of panels required.
Step 2: Evaluate Your Roof
Ensure your roof is in good condition and receives ample sunlight (ideally south-facing in the Northern Hemisphere).
Check for shading from trees or nearby buildings.
Step 3: Choose the Right Solar System
Grid-tied: Connects to the utility grid; no batteries needed.
Off-grid: Independent system with battery storage.
Hybrid: Combines both for flexibility.
Step 4: Design Your System Layout
Plan panel placement for maximum sun exposure.
Determine inverter and battery locations.
Sketch a wiring diagram.
Step 5: Install Mounting Hardware
Secure mounting brackets to roof rafters.
Use a level to ensure alignment.
Seal holes with waterproofing to prevent leaks.
Step 6: Mount the Solar Panels
Attach panels to the mounting hardware.
Double-check all bolts and fasteners.
Step 7: Wire the System
Connect panels to the inverter using appropriate gauge wiring.
For grid-tied systems, connect the inverter to your home’s electrical panel.
Install a generation meter if required by your utility.
Step 8: Ground the System
Proper grounding is essential for safety and code compliance.
Step 9: Test and Monitor
Power on the system and check for output.
Use monitoring software to track performance.
Safety Tips for DIY Solar Installation
Always turn off power before working with electrical components.
Use fall protection when working on the roof.
Follow local building codes and electrical regulations.
Consider hiring a licensed electrician for final connections.
Common Mistakes to Avoid
Underestimating energy needs: Leads to insufficient power generation.
Improper panel placement: Reduces efficiency.
Skipping permits: Can result in fines or forced removal.
Poor wiring: Increases fire risk and system failure.
Final Thoughts: Ready to Go Solar?
Installing your own solar panels can be a rewarding project that pays off for years to come. With the right tools, planning, and safety precautions, you can confidently set up a solar energy system for beginners that powers your home and protects the planet.